Pages

Sunday, November 4, 2012

Titanic Costume: Rose's "Jump Dress"

For Halloween this year, I decided to go as Rose from Titanic. Did you know that it's the 100th anniversary of the Titanic sinking? Simplicity re-released their Titanic pattern this year that first came out after the movie in 1997, so I decided to make this red and black dress. 


It's also known as the "Jump dress" because it's the dress Rose wears at the beginning of the movie when she attempts to jump over the railing. This is when Jack and Rose first meet, and he saves her from going overboard.


Don't jump Rose!

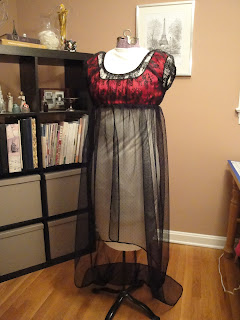
On the top part of the dress, there is a red satin bodice with a black lace top over it that has cap sleeves. It's a little hard to see, but I also put black sequin trim on the neck and armhole edges of the red bodice.


On the bottom part of the dress, there are actually three layers. First a red satin skirt, and then a single layer of black tulle. Attached to the tulle are two rows of black fringe and two rows of lace. To give the lace a wave-like shape, I cut out along the flowers and removed the top part of the border. 


The third layer on the bottom part of the dress is made out of a fabric called point d'esprit, which is basically black tulle with small dots. This layer is cut away in the front and forms the train at the back of the dress. To finish the edges, I used fabric glue to attached some black sequins, then trimmed away the excess fabric. Let me tell you, gluing through sheer fabric isn't easy! 

Did the sequins get stuck to the newspaper? Why yes, yes they did. 

 After all the layers were assembled, I had to attached them at the empire waist seam. I had to start with the outermost layers and work in, so first I attached the train, then the tulle, then the red satin. 


And here I am wearing the finished dress! 


These pictures make it seem like it went by fast, but it actually took a fair amount of time because there were so many steps along the way. I did have a lot of fun making this dress though. I really enjoyed the chance to use so many fun fabrics: satin, tulle, lace, fringe, and sequins! 

The only major change I made to the pattern was to add a black satin sash to better define the empire waist. There was a lot of fabric gathered around the waist, so I wanted to cinch it in so it wasn't so poufy!

To complete my costume, I bought a blue sapphire necklace from ebay just like the one Rose wears in the movie. Ok, not exactly like hers because mine only cost $10! I also wore long black gloves--the ones I wore to my prom so many years ago. And my costume wouldn't be complete without Rose's better half, Jack! To make things a little more interesting for Alan, he dressed up as "Frozen Jack" with blue lips, white face paint, and gel in his hair to make it look wet.

I'll never let go Jack, I'll never let go!!


Sunday, October 14, 2012

Transforming an Old Dress

I just finished transforming this dress that has been sitting in my bin of clothes to fix up.  I finally decided that I could turn it into a shorter tunic top that would look great with a pair of leggings for the fall.

Here is the before picture I took a long time ago (when my hair was much shorter!) 


 I cut off more than a foot from the bottom and sewed a new hem.
 I also cut a slit in the neckline to create a v-neck. 


Here is the finished top, which I paired with my new gray leggings and a black belt.


Doesn't it look much cuter now? I'm so excited to have a brand new piece that I got for free!

Wednesday, June 27, 2012

Sunflower cupcakes


I made these sunflower cupcakes for a party at work. They were a big hit!


I found the idea in my Hello Cupcake book. First I frosted each cupcake with green frosting. Then I placed regular oreos or mini oreos on top. I used a leaf decorating tip to put two layers of petals around each oreo. That's it! 


To save time I used regular store bought frosting and added food coloring, but it was a little soft. Next time I think I will use homemade buttercream frosting to get the right consistency.

Any ideas for what I should make next?


Saturday, April 28, 2012

Flower Power!

The next step in our effort to overhaul our yard was to plant some flowers to give us some more color. So one Sunday morning we went to Home Depot to buy a whole bunch of plants...


We ended up buying a lot of annuals, so that the colorful blooms would last all season.  From top to bottom in the picture below you can see we bought a skimmia (the only perennial), geraniums, begonias, petunias, gerbera daisies, a few different kinds of marigolds, snapdragons, and zinnia seeds. We also got tomatoes, hot peppers, mint, basil, and cucumber seeds.


Here are the before pictures...


Take a look at this close up. Our grass is growing!


For the hill in the backyard, we planted 15 groupings of plants. Look at how much more colorful it is!

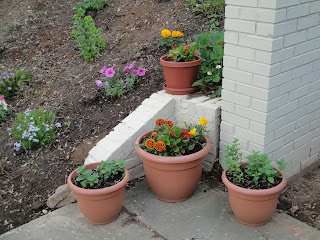
We added a few pots at the corner of the patio with flowers and mint.


On top of the wall, put a box full of petunias. Hopefully as they grow bigger they will drape over the side of the wall.


On the other side of the patio (near the grill) is our vegetable corner. Each tomato plant got its own pot, and we bought a large galvanized tub for the peppers, cucumbers, and basil.


We also moved our little pine tree to a bigger pot and added some new plants to keep it company.


Here are the pictures of the front yard with new plants and fresh mulch.


Our yard looks better already!

Saturday, April 7, 2012

Getting dirty!

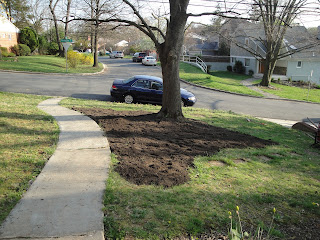
Two Fridays ago, I came home to this in the driveway:


The plan was to fill in the low spots in the front yard with topsoil, because it was impossible to mow around the tree. We also decided to finally create a proper path from the driveway to the front walkway. When we moved in last year, we took the small pavers that were near the basement door to serve as a temporary path. It only took us one year to find a more permanent solution!


The forecast called for rain all weekend, so we decided to start moving the dirt on Friday evening after work.


In less than three hours, we had moved all the dirt!


 This past weekend, we went to a stone quarry on Saturday morning to pick out new stones for our walkway. We chose Pennsylvania flagstone in 2 foot squares. When we got home, we started to dig out the ground to set the stones. 


First Alan had to chop up a few roots that were in the way. He loved the opportunity to get out the ax!


It took most of the afternoon to get the stones leveled, but in the end we had a brand new path! 


On Sunday, we spread grass seed over the entire front yard and then put down straw on top. 


Hopefully soon we'll have a yard with actual grass!

Monday, March 19, 2012

Just a Little Light Yard Work


Yes, you counted right. That's 11 bags, 2 trashcans, and 5 bundles of sticks!

This weekend Alan and I decided to try and tackle the wild jungle that is our backyard. I couldn't wait to rip out the nearly dead bushes and out of control vines! You can see how it looked last summer in this post.

First Alan ripped out everything around the compost bin and he was even able to move it back a few feet. 


Then we cleared out the middle section. I left a small clump of bushes in the middle...for now.
 We'll see how it looks once all the leaves come in.


Then finally we moved up the hill and tore up everything in sight!  


Some of the plants put up a good fight, but in the end we prevailed! 

There's another big yard project planned for next weekend, so stay tuned. 
Hopefully our backs will be healed by then!

Tuesday, March 13, 2012

Pinterest Challenge: Yarn Wreath

It's time for another Pinterest Challenge! 

Sherri from Young House Love issued a Pinterest Challenge last week to make something based on an inspirational picture found on Pinterest (my new favorite website!)

I have been eyeing a bunch of yarn wreaths for awhile now, so I thought it would be a fun project. Here is a picture of one that I really liked, which you can buy on Etsy for $30. 


I also fell in love with these felt flowers. I played around with all different types of flowers, but found these instructions to be the easiest to follow.


Here is a picture of my materials. I couldn't find a foam wreath, so instead I used one made of straw. I left on the plastic packaging, so it was pretty smooth. I also bought cream colored yarn, a few sheets of felt, and some creamy metallic berries. I think I spent less than $15 for everything.
 

I ended up only using the purple and gray felt to make the flowers. They were so easy to make! I cut a strip of felt about 2 inches wide, then folded it in half and used a bit of hot glue along one edge to stick it together. Then I made little cuts along the folded edge. I started rolling the felt at one end and adding a dab of glue every now and then to keep it together.


Here is the finished wreath!


I can't wait to hang it up on our front door!